The best way to truly master any technology is to build something with it - and nothing beats creating CRUD (Create, Read, Update, Delete) operations when it comes to learning the core concepts. These operations form the backbone of almost every application, making them the perfect starting point for hands-on learning.
In this comprehensive course, I’ll walk you through every step of the process - from setting up your project to implementing robust CRUD operations and managing database schema with Code First Migrations. Whether you’re a seasoned developer or just getting started with ASP.NET Core, this course will help you build scalable and maintainable APIs that follow industry best practices.
This is by-far the most detailed guide available today for the .NET Community and Developers.
By the end of this article, you’ll be able to easily build .NET 10 Web APIs, follow best practices while dealing with Entity Framework Core, and stand out in your next backend development interview. Let’s get started!
What We will Build?
We will build a .NET 10 Web API for managing movie details with comprehensive CRUD functionality, including:
- Create a New Movie: Add a new movie by providing details such as title, director, release date, and genre.
- Get a Movie by ID: Retrieve the details of a specific movie using its unique identifier.
- Get All Movies: List all movies.
- Update a Movie: Update the information of an existing movie by specifying its ID and the new details.
- Delete a Movie: Remove a movie from the database using its ID.
Key Specifications:
- PostgreSQL Database on Docker: Easily set up and manage the database in a containerized environment.
- OpenAPI Support with Scalar UI: Generate and explore API documentation effortlessly.
- Domain Driven Design: We will carefully design our Domain Entity (Movie) with DDD Practices.
- Entity Framework Core: Leverage EF Core for seamless database interactions with code-first migrations.
- Entity Configurations: Maintain clean and scalable database mappings with dedicated configuration classes.
- Minimal APIs: Build lightweight and performant APIs with minimal boilerplate.
- Data Seeding & Migration Workflows: Simplify initial data population and schema management.
- In-Memory Database for Development (Optional): Speed up development with an in-memory database.
- Best Practices: Ensure clean, maintainable, and scalable code using industry-standard best practices.
This Guide will be an invaluable resource for developers of all experience levels, providing hands-on experience with modern .NET development techniques and practical backend API implementation.
Who is this Guide for?
This guide is for .NET developers of all experience levels looking to build scalable Web APIs with modern development practices. Full-stack and backend developers can gain practical insights into API development with PostgreSQL, Docker, and Minimal APIs.
This is a very beginner friendly guide. Note that the entire source code of this implementation is available for FREE in my GitHub repository. You can find the links at the bottom of this article.
If you’re eager to build a well-structured .NET 10 Web API, this guide is for you.
PreRequisites
Here are the prerequisites,
- Visual Studio 2026 or Visual Studio 2022 (v17.13+) or VS Code with C# Dev Kit - Install from here.
- .NET 10 SDK Installed - Install from here.
- Docker Desktop installed on your machine - Install from here.
- Internet access to download PostgreSQL Docker Image.
Project Setup
Let’s get started with the development. Open up Visual Studio IDE (I personally use Visual Studio 2026 Community Edition), and create a new ASP.NET Core WebAPI Project.
We will select the .NET 10 Framework, and keep everything else as the default.
Make sure that you have enabled the Enable OpenAPI support checkbox.
Note: The project will target
net10.0as the framework. You can verify this in your.csprojfile where<TargetFramework>net10.0</TargetFramework>should be set.
I will cleanup the solution, and remove the weather forecast sample code that ships with the default .NET template.
I have also added a simple GET Endpoint to Program.cs that returns a ‘Hello World’ message.
app.MapGet("/", () => "Hello World!") .Produces(200, typeof(string));Configuring OpenAPI and Scalar UI
As we know that, starting from .NET 10 and above, the default .NET Templates do not include Swagger. That’s why we have OpenAPI as part of the project configuration. If you aren’t already aware of this breaking change, I have written a article covering why Microsoft has taken this decision, and what are the alternatives to Swagger. You can read the article from below.
However, let’s install the Scalar Package and wire it up with our shiny new .NET WebAPI.
Install-Package Scalar.AspNetCoreOnce installed, let’s integrate it with our Web API. Open up Program.cs and add in the following highlighted file.
if (app.Environment.IsDevelopment()){ app.MapOpenApi(); app.MapScalarApiReference();}Also, open the launchSettings.json file and add the below highlighted lines so that the ScalarU is launched as soon as the WebAPI runs.
"https": { "commandName": "Project", "dotnetRunMessages": true, "launchBrowser": true, "launchUrl": "scalar/v1", "applicationUrl": "https://localhost:7157;http://localhost:5131", "environmentVariables": { "ASPNETCORE_ENVIRONMENT": "Development" } }With that done, let’s build and run our application. This would open up the browser at scalar/v1 as below.

I will keep things simple for now. However, there are tons of customizations available at both the OpenAPI and Scalar levels. To know more about this, please read this article.
Adding the Base Class - Domain Driven Design
As mentioned earlier, we will be following a simple DDD, aka Domain Driven Design Approach to structure our .NET application. Domain-Driven Design (DDD) focuses on modeling the software to match the business domain, ensuring a scalable and maintainable architecture. By following this approach, we aim to build a solution that is both understandable and adaptable to changing requirements.
DDD pairs well with layered architectures like Onion Architecture, where the domain sits at the center and all dependencies point inward. For this tutorial, we’re keeping it simple with a single project, but the principles we’re following here scale to larger, multi-layered solutions.
If you want to have an in-depth article on advanced DDD patterns (Aggregates, Value Objects, Domain Events), do let me know in the comments section.
In Domain-Driven Design (DDD) and clean architecture practices, having a base class for entities is a common design pattern. The base class EntityBase allows us to centralize common properties and behaviors that all domain entities will share. This provides consistency and reduces code duplication across the project.
Let’s create a new folder named Models and add a new class named EntityBase.
public abstract class EntityBase{ public Guid Id { get; private init; } = Guid.NewGuid(); public DateTimeOffset Created { get; private set; } = DateTimeOffset.UtcNow; public DateTimeOffset LastModified { get; private set; } = DateTimeOffset.UtcNow; public void UpdateLastModified() { LastModified = DateTimeOffset.UtcNow; }}An EntityBase class serves as a foundational blueprint for all entities in a domain-driven application. It encapsulates common properties like Id, Created, and LastModified, which are essential for tracking an entity’s identity and lifecycle events. By centralizing these properties in a base class, we reduce code duplication and maintain a consistent structure across all entity classes.
Making the class abstract ensures that it cannot be instantiated on its own, as it is meant to provide shared functionality rather than represent a standalone concept. Entities in the domain, such as Movie, inherit from EntityBase to gain these common attributes and methods while defining their unique properties and behaviors. The use of access modifiers like private init for the Id ensures immutability after creation, promoting integrity. Similarly, restricting setters for Created and LastModified enforces controlled updates, preserving reliable timestamp information. The UpdateLastModified method allows entities to track modifications seamlessly, supporting audit trails and data integrity.
Adding the Movie Entity - Domain Driven Design
Next up, let’s build the actual entity. Create a new class named Movie inside the Models folder.
This entity will represent the core information about a movie in our system. An entity is typically defined by having an identity (Id) and encapsulating business rules that relate to its data.
public sealed class Movie : EntityBase{    public string Title { get; private set; }    public string Genre { get; private set; }    public DateTimeOffset ReleaseDate { get; private set; }    public double Rating { get; private set; }
    // Private constructor for ORM frameworks    private Movie()    {        Title = string.Empty;        Genre = string.Empty;    }    private Movie(string title, string genre, DateTimeOffset releaseDate, double rating)    {        Title = title;        Genre = genre;        ReleaseDate = releaseDate;        Rating = rating;    }
    public static Movie Create(string title, string genre, DateTimeOffset releaseDate, double rating)    {        ValidateInputs(title, genre, releaseDate, rating);        return new Movie(title, genre, releaseDate, rating);    }
    public void Update(string title, string genre, DateTimeOffset releaseDate, double rating)    {        ValidateInputs(title, genre, releaseDate, rating);
        Title = title;        Genre = genre;        ReleaseDate = releaseDate;        Rating = rating;
        UpdateLastModified();    }
    private static void ValidateInputs(string title, string genre, DateTimeOffset releaseDate, double rating)    {        if (string.IsNullOrWhiteSpace(title))            throw new ArgumentException("Title cannot be null or empty.", nameof(title));
        if (string.IsNullOrWhiteSpace(genre))            throw new ArgumentException("Genre cannot be null or empty.", nameof(genre));
        if (releaseDate > DateTimeOffset.UtcNow)            throw new ArgumentException("Release date cannot be in the future.", nameof(releaseDate));
        if (rating < 0 || rating > 10)            throw new ArgumentException("Rating must be between 0 and 10.", nameof(rating));    }}
The Movie class represents a movie entity in the application and builds on the EntityBase class. It includes properties like Title, Genre, ReleaseDate, and Rating to define the essential details of a movie. These properties have private setters to ensure that changes can only be made within the class, maintaining the integrity of the object.
To create a new movie instance, the class provides a Create() method instead of directly exposing constructors. This approach allows input validation before the object is created, ensuring that the entity always starts in a valid state. The private constructor supports ORM frameworks that require parameter-less constructors to instantiate objects during database operations.
The Update() method lets you modify the properties of a movie while ensuring the new values are valid. It updates the LastModified property to track when changes were made. Validation rules are enforced to prevent invalid data, such as empty titles or genres, future release dates, and ratings outside the 0-10 range.
This design focuses on maintaining the correctness of the movie entity and enforcing domain rules at the entity level. It helps ensure that objects are always in a valid state and promotes clean and maintainable code.
What is Entity Framework Core?
Entity Framework Core (EF Core) is a lightweight, open-source, cross-platform Object-Relational Mapper (ORM) for .NET that allows developers to work with databases using .NET objects instead of writing SQL queries manually. It supports Code First and Database First approaches, works with multiple database providers including SQL Server, PostgreSQL, MySQL, and SQLite, and is specifically designed for modern .NET applications (.NET 5+, .NET Core, and .NET Framework).
EF Core eliminates the need for most data-access code by translating LINQ queries into SQL, tracking changes to objects, and automatically generating database schemas from your C# classes. It’s the recommended data access technology for new .NET applications, offering better performance, more features, and regular updates compared to the legacy Entity Framework 6.x.
How to Add Entity Framework Core to ASP.NET Core Project
To integrate Entity Framework Core with PostgreSQL in your ASP.NET Core project, follow these steps:
1. Install the Core EF Package
Install-Package Microsoft.EntityFrameworkCore -Version 10.0.0This provides the core Entity Framework Core functionality for working with databases.
2. Install EF Core Design Tools
Install-Package Microsoft.EntityFrameworkCore.Design -Version 10.0.0This package includes design-time tools needed for creating and managing migrations.
3. Install PostgreSQL Database Provider
Install-Package Npgsql.EntityFrameworkCore.PostgreSQL -Version 10.0.0This adds PostgreSQL-specific support, allowing EF Core to work with PostgreSQL databases.
4. Register DbContext in Program.cs
After installing packages, register your DbContext using AddDbContext:
builder.Services.AddDbContext<MovieDbContext>(options => options.UseNpgsql(builder.Configuration.GetConnectionString("DefaultConnection")));These packages provide everything needed for EF Core to work with PostgreSQL. We’re using version 10.0.0 to match our .NET 10 target framework (net10.0).
Adding DBContext
Create a MovieDbContext class to manage the database operations for the application. I have created a folder named ‘Persistence’ and added a new class named MovieDbContext. Here’s a clean and well-structured implementation:
public class MovieDbContext(DbContextOptions<MovieDbContext> options) : DbContext(options){    public DbSet<Movie> Movies => Set<Movie>();
    protected override void OnModelCreating(ModelBuilder modelBuilder)    {        modelBuilder.HasDefaultSchema("app");        modelBuilder.ApplyConfigurationsFromAssembly(typeof(MovieDbContext).Assembly);        base.OnModelCreating(modelBuilder);    }}
The MovieDbContext class is a custom implementation of EF Core’s DbContext, which serves as the primary way to interact with the database. By inheriting from DbContext, this class provides access to core database operations such as querying, updating, and saving changes.
The constructor takes DbContextOptions<MovieDbContext> as a parameter, which allows the configuration of the context, including the database provider and connection string. This design ensures that the context remains flexible and easily configurable for different environments.
The DbSet<Movie> property exposes a strongly typed collection of Movie entities. This collection maps directly to the Movies table in the database and provides a clean way to perform CRUD operations using LINQ queries.
In the OnModelCreating method, the HasDefaultSchema call sets the schema to “app,” which is useful for organizing tables under a specific namespace in PostgreSQL. The call to ApplyConfigurationsFromAssembly ensures that any entity configurations defined in the assembly are automatically applied, promoting cleaner and more maintainable code. Finally, the base.OnModelCreating(modelBuilder); call ensures that the default configurations defined by the DbContext are also applied.
IEntityTypeConfiguration: Why?
In Entity Framework Core, configuration for database entities can be done in multiple ways. One option is to use Data Annotations directly in the entity classes. However, this approach can clutter the model classes and tightly couple them to EF Core. A cleaner and more maintainable approach is to use the IEntityTypeConfiguration<T> interface, which allows us to separate entity configurations into dedicated classes.
This interface provides a Configure method where you can define various database mapping details, such as table names, keys, relationships, constraints, and indexes. This decoupled approach improves code organization and promotes adherence to the Single Responsibility Principle, making your codebase easier to manage and extend. Additionally, it enables better reusability and flexibility, especially in larger projects where multiple entities require complex configurations.
By using IEntityTypeConfiguration, you can centralize all database-specific logic for an entity, ensuring that your model classes remain focused solely on business logic. This separation also aligns well with migration and schema evolution scenarios, as all configurations are defined in one place, making it easier to maintain and update the database mappings over time. For a comprehensive deep dive into entity configuration patterns, advanced relationship mapping, and best practices, check out our detailed guide on Configuring Entities with Fluent API in EF Core.
Under the Persistence folder, create a new folder called Configurations and add a new class MovieConfiguration.
public class MovieConfiguration : IEntityTypeConfiguration<Movie>{    public void Configure(EntityTypeBuilder<Movie> builder)    {        // Define table name        builder.ToTable("Movies");
        // Set primary key        builder.HasKey(m => m.Id);
        // Configure properties        builder.Property(m => m.Title)               .IsRequired()               .HasMaxLength(200);
        builder.Property(m => m.Genre)               .IsRequired()               .HasMaxLength(100);
        builder.Property(m => m.ReleaseDate)               .IsRequired();
        builder.Property(m => m.Rating)               .IsRequired();
        // Configure Created and LastModified properties to be handled as immutable and modifiable timestamps        builder.Property(m => m.Created)               .IsRequired()               .ValueGeneratedOnAdd();
        builder.Property(m => m.LastModified)               .IsRequired()               .ValueGeneratedOnUpdate();
        // Optional: Add indexes for better query performance        builder.HasIndex(m => m.Title);    }}
The MovieConfiguration class implements IEntityTypeConfiguration<Movie>, allowing us to define how the Movie entity should be mapped to the database. This configuration is cleanly encapsulated in the Configure method.
Inside the Configure method, the first step is defining the table name using builder.ToTable("Movies"). This explicitly maps the entity to the Movies table, even if EF Core would infer the name by default.
Next, the primary key is defined using builder.HasKey(m => m.Id);. This ensures that the Id property is treated as the primary key when the database schema is created.
Property configurations are specified using the Property method. For example, builder.Property(m => m.Title).IsRequired().HasMaxLength(200); ensures that the Title property is mandatory and has a maximum length of 200 characters. Similarly, other properties such as Genre, ReleaseDate, and Rating are also marked as required, with some constraints like maximum length.
Timestamps are configured for the Created and LastModified properties. The line builder.Property(m => m.Created).IsRequired().ValueGeneratedOnAdd(); ensures that Created is set when the entity is first added. On the other hand, builder.Property(m => m.LastModified).IsRequired().ValueGeneratedOnUpdate(); ensures that LastModified is updated whenever the entity is modified.
Finally, builder.HasIndex(m => m.Title); creates a database index on the Title column. This can significantly improve query performance when searching or filtering by Title.
This structured configuration keeps entity models clean and focuses purely on the domain logic, while all database-related settings are neatly managed in a separate class.
Named Query Filters - New in EF Core 10
NEW in .NET 10: Entity Framework Core 10 introduces named query filters, a powerful feature that allows multiple filters per entity type with selective control. This is a significant improvement over previous versions where only a single global query filter was supported per entity.
Why Named Query Filters Matter
Named query filters are perfect for implementing multiple cross-cutting concerns like:
- Soft-delete patterns - Filter out deleted records by default
- Multi-tenancy - Isolate data by tenant
- Active/Inactive filtering - Show only active records
- Date-based filtering - Hide expired or future-dated records
Previously in EF Core 9 and earlier, you could only have one query filter per entity, making it difficult to combine multiple filtering strategies. With EF Core 10, you can define multiple named filters and selectively ignore specific ones in your queries.
Example: Implementing Named Query Filters
Here’s how you could extend the Movie entity with multiple query filters:
public class MovieConfiguration : IEntityTypeConfiguration<Movie>{    public void Configure(EntityTypeBuilder<Movie> builder)    {        // ... existing configuration ...
        // Named query filter for soft delete        builder.HasQueryFilter("SoftDelete", m => !m.IsDeleted);
        // Named query filter for active records only        builder.HasQueryFilter("ActiveOnly", m => m.IsActive);    }}
Then in your queries, you can selectively ignore specific filters:
// Gets only active, non-deleted movies (both filters applied)var activeMovies = await _dbContext.Movies.ToListAsync();
// Gets all movies including deleted ones (ignores SoftDelete filter)var allMovies = await _dbContext.Movies    .IgnoreQueryFilter("SoftDelete")    .ToListAsync();
// Gets all movies including inactive ones (ignores ActiveOnly filter)var allActiveAndInactive = await _dbContext.Movies    .IgnoreQueryFilter("ActiveOnly")    .ToListAsync();
This provides much more granular control over your data access patterns and makes it easier to implement complex business rules at the database level.
Note: While we haven’t implemented soft-delete or multi-tenancy in this basic CRUD example, named query filters are a powerful tool to keep in mind for production applications. They help keep your queries clean while enforcing business rules consistently across your application.
Running PostgreSQL on Docker Container
To quickly and efficiently set up a PostgreSQL instance, Docker is an ideal solution. It enables you to run a fully isolated database environment, without making changes to your local development setup.
Before proceeding, ensure that Docker Desktop is installed on your machine. It’s also beneficial to have a basic understanding of Docker. If you’re new to Docker, feel free to check out my comprehensive Docker guide for .NET developers to get up to speed.
Create a new file named docker-compose.yml at the root of the solution and add the following.
services:  postgres:    image: postgres:17-alpine    container_name: postgres    restart: always    environment:      POSTGRES_USER: admin      POSTGRES_PASSWORD: secret      POSTGRES_DB: dotnetHero    ports:      - "5432:5432"    volumes:      - postgres_data:/var/lib/postgresql/data    healthcheck:      test: ["CMD-SHELL", "pg_isready -U admin -d dotnetHero"]      interval: 10s      timeout: 5s      retries: 5
volumes:  postgres_data:
This docker-compose.yml file sets up a PostgreSQL service using modern Docker Compose syntax (no version: field needed - Docker Compose V2 automatically uses the latest schema).
Key configuration details:
image: postgres:17-alpine- Uses PostgreSQL 17 with Alpine Linux for a smaller image size (~80MB vs ~130MB)container_name: postgres- Names the container for easy referencerestart: always- Automatically restarts if the container stops or system reboots- Environment variables - Sets up default user (
admin), password (secret), and database (dotnetHero) - Port mapping - Exposes PostgreSQL on port
5432for external access - Volume - Persists database data using
postgres_datavolume, ensuring data survives container restarts - Health check - Monitors PostgreSQL availability using
pg_isreadycommand
Note: The
version:field is obsolete in Docker Compose V2 (2020+) and should be omitted. Docker Compose now automatically uses the most recent schema.
I typically use pgAdmin to navigate through the objects in PostgreSQL databases.
Once done, open a terminal, navigate to the directory containing the docker-compose.yml, and execute:
docker compose up -dCommand breakdown:
docker compose(notdocker-compose) - Docker Compose V2 command (no hyphen)up- Creates and starts the containers-d- Runs in detached mode (background)
This will pull the PostgreSQL 17 Alpine image (~80MB), set up the container, and expose it on port 5432. The health check ensures PostgreSQL is ready before your application connects.
Running PostgreSQL in a Docker container is a great way to simplify your development and testing environment. It offers a consistent, isolated setup that can easily be replicated across different machines. With minimal configuration, you can quickly integrate PostgreSQL into your application.
Other Options:
- Using Local Installation: You can install PostgreSQL directly on your machine. While this provides full control over the environment, it can be less portable and may lead to versioning issues when working across different systems.
- Managed PostgreSQL Services (Cloud): Services like Amazon RDS, Azure Database for PostgreSQL, and Google Cloud SQL offer fully managed PostgreSQL instances. These are ideal for production environments where scalability, availability, and maintenance are crucial.
- Virtual Machines: Running PostgreSQL in a virtual machine (VM) is another option, especially when you need a more isolated environment or specific configurations. However, this is heavier than using Docker and requires more system resources.
Each option has its advantages depending on your project’s needs, from ease of use with Docker to the scalability and maintenance benefits of managed cloud services.
Connection String Configuration
Next, let’s configure the connection string for your PostgreSQL database. Open the appsettings.json file and add the following:
"ConnectionStrings": { "DefaultConnection": "Host=localhost;Port=5432;Database=dotnetHero;Username=admin;Password=secret;"}The key "DefaultConnection" can be customized, but make sure to use the same name consistently in your code when registering the DbContext, as it will reference this key for database connection details.
Registering the DbContext
To register the MovieDbContext in your application, add the following code in the Program.cs file:
builder.Services.AddDbContext<MovieDbContext>(options =>{ var connectionString = builder.Configuration.GetConnectionString("DefaultConnection"); options.UseNpgsql(connectionString);});Explanation:
AddDbContext<MovieDbContext>: This registers theMovieDbContextwith the dependency injection container, enabling it to be used throughout the application.- UseNpgsql: This method tells EF Core to use PostgreSQL as the database provider, with the connection string fetched from
appsettings.json. - GetConnectionString(“DefaultConnection”): Retrieves the connection string with the key
"DefaultConnection"from yourappsettings.jsonfile.
With this configuration, the MovieDbContext is now ready to interact with the PostgreSQL database using the specified connection string.
Code First vs Database First: Which Approach Should You Use?
Before diving into migrations, let’s clarify the difference between EF Core’s two main approaches. Understanding this will help you make the right architectural decision for your projects.
| Aspect | Code First | Database First |
|---|---|---|
| Starting Point | Write C# entity classes first, then generate database | Start with existing database, generate C# classes |
| Best For | New projects (greenfield) | Legacy databases (brownfield) |
| Control | Full control over domain models | Schema dictates model structure |
| Version Control | Easy to track entity changes in git | Harder to manage schema changes |
| Migrations | Clean, automatic migrations from code | Manual schema synchronization |
| Domain-Driven Design | Perfect alignment with DDD principles | Domain logic separated from database schema |
| Team Collaboration | Better for teams (merge conflicts are code-based) | Harder (database schema conflicts) |
| Learning Curve | Moderate (need to understand migrations) | Lower (schema already exists) |
| Flexibility | High (change entities, update database) | Limited (constrained by existing schema) |
| When to Use | ✅ New applications ✅ Microservices ✅ Clean architecture projects | ✅ Existing databases ✅ Database-heavy legacy systems ✅ Shared databases across multiple apps |
Recommendation: For this tutorial and most modern .NET applications, Code First is the recommended approach. It gives you full control over your domain models, integrates seamlessly with DDD principles, and makes it easier to evolve your application over time.
Adding the Code First Migrations
Now, let’s add the necessary migrations to generate the database schema based on your entity model.
- Add a migration: Run the following command in the terminal to create a migration that will generate the database schema based on your
MovieDbContext:Terminal window dotnet ef migrations add InitialCreate- This will generate a migration named
InitialCreate. You can replace this with any other descriptive name if needed. - The migration contains instructions for EF Core on how to create the tables and define their structure.
- This will generate a migration named
- Update the database: After adding the migration, you can apply it to the database with the following command:
Terminal window dotnet ef database update- This will execute the migration and create the database and tables (if they don’t already exist) based on the defined
DbContextand models. - It applies the changes to the PostgreSQL database specified in your connection string.
- This will execute the migration and create the database and tables (if they don’t already exist) based on the defined
With this setup, you can now manage your database schema through EF Core migrations and easily sync changes with your PostgreSQL database.
And here is what my Migrations file looks like.

Seeding Data
Now that we have our database tables in place, we need some initial data to the Movies table. Here is where Seeding comes.
Seeding data is a process of populating a database with initial data, which can be essential during development, testing, or even in production environments. It’s an important step to ensure that your application has the necessary data available to work with when it starts.
In our MovieDbContext, add the following code.
protected override void OnConfiguring(DbContextOptionsBuilder optionsBuilder) { optionsBuilder .UseAsyncSeeding(async (context, _, cancellationToken) => { var sampleMovie = await context.Set<Movie>().FirstOrDefaultAsync(b => b.Title == "Sonic the Hedgehog 3"); if (sampleMovie == null) { sampleMovie = Movie.Create("Sonic the Hedgehog 3", "Fantasy", new DateTimeOffset(new DateTime(2025, 1, 3), TimeSpan.Zero), 7); await context.Set<Movie>().AddAsync(sampleMovie); await context.SaveChangesAsync(); } }) .UseSeeding((context, _) => { var sampleMovie = context.Set<Movie>().FirstOrDefault(b => b.Title == "Sonic the Hedgehog 3"); if (sampleMovie == null) { sampleMovie = Movie.Create("Sonic the Hedgehog 3", "Fantasy", new DateTimeOffset(new DateTime(2025, 1, 3), TimeSpan.Zero), 7); context.Set<Movie>().Add(sampleMovie); context.SaveChanges(); } }); }EF 9 introduced the UseSeeding and UseAsyncSeeding methods, which streamline the process of seeding the database with initial data. These methods simplify the way developers can implement custom initialization logic, offering a central location for all data seeding operations. The advantage of using these methods is that they integrate seamlessly with EF Core’s migration locking mechanism, which ensures that data seeding happens safely and without concurrency issues.
One of the key benefits of these new methods is their automatic execution during operations like EnsureCreated, Migrate, and the dotnet ef database update command. This happens even if there are no changes to the model or migrations, ensuring that the database is consistently seeded with the required data whenever the application is set up or updated.
By leveraging UseSeeding and UseAsyncSeeding, developers can manage and execute seeding tasks in a more organized, reliable, and concurrent-safe manner.
In summary, this code checks if a movie with a specific title exists in the database. If it doesn’t, it creates a new movie and saves it to the database. This is a common pattern used for seeding data or ensuring that certain records are present in the database.
Finally, to trigger the seeding process, let’s add a EnsureCreatedAsync call. In Program.cs file, add the following.
await using (var serviceScope = app.Services.CreateAsyncScope())await using (var dbContext = serviceScope.ServiceProvider.GetRequiredService<MovieDbContext>()){ await dbContext.Database.EnsureCreatedAsync();}The provided code snippet is an example of how to ensure that the database is created asynchronously when the application starts. First, it creates a scoped service provider using app.Services.CreateAsyncScope(). This is important because it ensures that services within the scope, such as the MovieDbContext, are disposed of properly when no longer needed. Within this scope, the code retrieves the required MovieDbContext from the service provider using GetRequiredService<MovieDbContext>(). Then, it calls dbContext.Database.EnsureCreatedAsync(), which asynchronously checks if the database exists and creates it if it doesn’t. This ensures that the database is in place before any data operations are performed, preventing errors that might occur if the database is missing. This pattern is typically used in applications where database creation is required at startup but where migrations are not being used (e.g., for small-scale or prototype applications).
This ensures the database is created and the seed data is added.
Important
It’s important to note that the provided code snippet is not recommended for production use.
This approach is suitable for development or prototyping environments where you want to quickly set up a database without the need for migrations. The code ensures that the database is created if it doesn’t already exist, preventing errors when running the application for the first time. However, it bypasses the more robust and structured approach
Recommended Approach for Production
- Use EF Core Migrations instead of
EnsureCreatedAsync. Migrations provide a systematic way to evolve your database schema while preserving existing data.
When to Use EnsureCreatedAsync?
This pattern is ideal for:
- Development environments for quick testing
- Prototyping small-scale applications
Adding the DTOs - ViewModels
DTOs (Data Transfer Objects) play an essential role in software development by serving as lightweight objects used to transfer data between different parts of an application, such as between the backend and the frontend. They are particularly important in web APIs and service-oriented architectures.
One primary reason for using DTOs is to decouple the internal domain models from the external representation sent over the network. Directly exposing domain entities can lead to security risks, data overexposure, and unwanted changes in the structure when evolving the application. DTOs allow developers to define exactly what data should be shared, providing better control over serialization and data formatting.
Another advantage is improved performance and bandwidth efficiency. DTOs allow you to shape the response payload by sending only the required fields rather than the entire domain object. This reduces the size of the transmitted data, which is critical in scenarios involving slow networks or mobile applications.
DTOs also play a vital role in data validation and mapping. They allow you to perform input validation at the boundary of your application, ensuring that only valid and well-structured data reaches your domain models. Additionally, they simplify mapping data between domain models and client-facing views, often using libraries like AutoMapper.
In summary, DTOs help achieve clean architecture by decoupling the internal and external representations of data, enhancing security, performance, and maintainability. They are a best practice for designing scalable and maintainable APIs.
In our case, if let’s say a client requests for a Movie with ID #3, if the API returns the Movie class, it would lead to overexposure of fields like CreatedOn and other sensitive properties. So, instead of directly exposing the Movie entity, we can return a well-defined DTO that includes only the relevant and safe properties, such as Title, Genre, ReleaseDate, and Rating. By doing so, we maintain better control over the data sent to the client and ensure that sensitive fields like CreatedOn and LastModified are hidden from public access.
Additionally, using DTOs provides flexibility in shaping the API responses. For example, we can create different DTOs based on the client requirements, such as a MovieDetailsDTO with comprehensive information and a MovieSummaryDTO with just the essential details for a list view. This approach also ensures that any future changes to the internal domain models do not directly impact the external API contract, making the system more maintainable and scalable.
In cases where transformations are required, such as converting DateTimeOffset values to a user-friendly format, DTOs provide an ideal layer to handle such custom mappings without affecting the core domain logic. Overall, the use of DTOs fosters better API design, enhances security, and supports a cleaner separation of concerns.
Let’s create a new folder named DTOs and add the following records.
public record CreateMovieDto(string Title, string Genre, DateTimeOffset ReleaseDate, double Rating);public record UpdateMovieDto(string Title, string Genre, DateTimeOffset ReleaseDate, double Rating);public record MovieDto(Guid Id, string Title, string Genre, DateTimeOffset ReleaseDate, double Rating);Creating DTOs for the Movie entity helps maintain a clean separation between the domain model and API requests or responses. In this case, we define three records within a new DTOs folder.
The CreateMovieDto record encapsulates the data required when a client creates a new movie entry. This includes Title, Genre, ReleaseDate, and Rating. By using this DTO, we ensure that the API only accepts the relevant information needed to initialize a movie.
The UpdateMovieDto record handles the data when updating an existing movie. Its properties mirror those in CreateMovieDto, as updating typically involves modifying the same fields as creation.
Lastly, MovieDto is designed for responses sent back to the client. It includes an Id property to uniquely identify the movie along with the other fields. By returning this DTO instead of the full Movie entity, we avoid exposing internal details and maintain control over the API’s data contract.
This setup using DTOs with records makes the API cleaner, more secure, and aligned with best practices for RESTful services.
The IMovieService Interface
Here is the core part of the implementation, services. Create a new folder named Services and add the following IMovieService interface.
public interface IMovieService{ Task<MovieDto> CreateMovieAsync(CreateMovieDto command); Task<MovieDto?> GetMovieByIdAsync(Guid id); Task<IEnumerable<MovieDto>> GetAllMoviesAsync(); Task UpdateMovieAsync(Guid id, UpdateMovieDto command); Task DeleteMovieAsync(Guid id);}The CreateMovieAsync method handles the creation of a new movie by accepting a CreateMovieDto command and returning the newly created movie as a MovieDto.
The GetMovieByIdAsync method retrieves a specific movie based on its unique identifier (Guid).
GetAllMoviesAsync fetches a collection of all movies, returning them as an IEnumerable<MovieDto>.
UpdateMovieAsync allows updating an existing movie. The method accepts the movie’s identifier and an UpdateMovieDto, which contains the updated data.
Lastly, DeleteMovieAsync is responsible for deleting a movie based on its unique identifier.
By defining these methods in the IMovieService interface, the application maintains a clear separation of concerns, enabling easier testing, better maintainability, and adherence to SOLID principles, especially the Dependency Inversion Principle.
CRUD Operations - MovieService Implementation
Now that we have defined the interface, Let’s implement it. Create a new class named MovieService.
public class MovieService : IMovieService{    private readonly MovieDbContext _dbContext;    private readonly ILogger<MovieService> _logger;
    public MovieService(MovieDbContext dbContext, ILogger<MovieService> logger)    {        _dbContext = dbContext;        _logger = logger;    }}
We’re using constructor-based dependency injection here, which is the recommended approach in ASP.NET Core. The ILogger<T> is provided automatically by the framework’s built-in logging infrastructure, and the MovieDbContext is injected from the DI container we configured earlier.
Let’s add in the following CRUD Operations, one by one.
Create
 public async Task<MovieDto> CreateMovieAsync(CreateMovieDto command) {     var movie = Movie.Create(command.Title, command.Genre, command.ReleaseDate, command.Rating);
     await _dbContext.Movies.AddAsync(movie);     await _dbContext.SaveChangesAsync();
     return new MovieDto(        movie.Id,        movie.Title,        movie.Genre,        movie.ReleaseDate,        movie.Rating     ); }
The CreateMovieAsync method is responsible for handling the creation of a new movie in the database. It begins by invoking the Movie.Create factory method, which encapsulates the entity creation logic. This ensures that any business rules or validations are enforced during the creation process.
Once the movie entity is created, it is added to the DbContext using AddAsync. This operation marks the entity for tracking, signaling that it should be persisted to the database when changes are saved.
Next, SaveChangesAsync is called to persist the new movie entry to the database. Using asynchronous methods ensures that the API remains responsive and can handle other requests efficiently.
Finally, the method returns a MovieDto object, which contains only the essential fields to be exposed to the client. This approach prevents overexposure of sensitive data and maintains a clean separation between the entity and the API’s response model.
Read
public async Task<IEnumerable<MovieDto>> GetAllMoviesAsync(){ return await _dbContext.Movies .AsNoTracking() .Select(movie => new MovieDto( movie.Id, movie.Title, movie.Genre, movie.ReleaseDate, movie.Rating )) .ToListAsync();}The GetAllMoviesAsync method retrieves all movies from the database without tracking changes for better performance. It maps each movie to a MovieDto, ensuring only essential fields are returned. The use of ToListAsync allows for efficient asynchronous database access.
Using AsNoTracking() is crucial for read-only queries as it skips EF Core’s change tracking overhead, significantly improving performance. For high-traffic APIs, consider adding caching on top of this for even better performance.
🚀 .NET 10 Performance Benefits
EF Core 10 provides 25-50% better performance compared to EF Core 9 for identical CRUD operations. The improvements are automatic - your existing code runs faster without modifications. Key enhancements include named query filters (used in this tutorial), native LeftJoin/RightJoin operators, and production-ready vector similarity search for AI workloads.
public async Task<MovieDto?> GetMovieByIdAsync(Guid id){    var movie = await _dbContext.Movies                           .AsNoTracking()                           .FirstOrDefaultAsync(m => m.Id == id);    if (movie == null)        return null;
    return new MovieDto(        movie.Id,        movie.Title,        movie.Genre,        movie.ReleaseDate,        movie.Rating    );}
The GetMovieByIdAsync method fetches a specific movie by its Id from the database without tracking changes. If no matching movie is found, it returns null. If found, it maps the movie entity to a MovieDto and returns it, ensuring only essential data is exposed.
Update
public async Task UpdateMovieAsync(Guid id, UpdateMovieDto command){ var movieToUpdate = await _dbContext.Movies.FindAsync(id); if (movieToUpdate is null) throw new ArgumentNullException($"Invalid Movie Id."); movieToUpdate.Update(command.Title, command.Genre, command.ReleaseDate, command.Rating); await _dbContext.SaveChangesAsync();}The UpdateMovieAsync method handles updating an existing movie in the database. It first searches for the movie by its Id. If no movie is found, it throws an ArgumentNullException. If found, it updates the movie’s properties using the provided UpdateMovieDto and then saves the changes to the database. This approach ensures efficient entity tracking and persistence within EF Core.
Delete
public async Task DeleteMovieAsync(Guid id){ var movieToDelete = await _dbContext.Movies.FindAsync(id); if (movieToDelete != null) { _dbContext.Movies.Remove(movieToDelete); await _dbContext.SaveChangesAsync(); }}The DeleteMovieAsync method is pretty straightforward. It looks up the movie by its Id. If a match is found, it removes the movie from the database and commits the change by calling SaveChangesAsync(). If no movie is found, it quietly does nothing - no exceptions, no drama.
Some of you might argue that throwing an exception when a movie isn’t found would be more explicit and help catch potential issues. However, in this case, it’s unnecessary overhead for a simple delete operation. If the movie doesn’t exist, there’s nothing to remove, and the outcome is already what we want. Keeping the logic clean and lightweight makes the code easier to maintain and avoids unnecessary exception handling.
Minimal API Endpoints
Now that we’ve implemented the core logic for our movie service, it’s time to expose these functionalities via API endpoints. For this demonstration, we’ll use Minimal API Endpoints, which provide a simple and concise way to set up APIs without the overhead of controllers.
Minimal APIs vs Controllers: Choosing the Right Approach
Before implementing our endpoints, let’s compare Minimal APIs with traditional Controllers to understand when to use each approach:
| Aspect | Minimal APIs | Controllers |
|---|---|---|
| Syntax | Concise, functional style | Class-based, OOP style |
| Boilerplate | Minimal (no base classes) | More verbose (inherit from ControllerBase) |
| Performance | Slightly faster (~5-10%) | Comparable performance |
| Best For | Simple CRUD APIs, microservices, small APIs | Complex APIs, established patterns, large teams |
| Dependency Injection | Inline in route handlers | Constructor injection in controllers |
| Model Binding | Explicit parameter binding | Automatic with attributes ([FromBody], [FromRoute]) |
| Filters/Middleware | Can be added but requires more code | Built-in filter support (ActionFilters, AuthorizationFilters) |
| Route Organization | Grouped by feature using MapGroup | Grouped by controller class |
| Testing | Easier to test (just functions) | Standard unit testing patterns |
| IDE Support | Good in recent IDEs | Excellent (mature tooling) |
| Learning Curve | Lower for beginners | Higher (need to understand controllers, attributes) |
| Code Organization | Can become messy in large apps | Better structure for complex scenarios |
| When to Use | ✅ New .NET 6+ projects ✅ Microservices ✅ Simple CRUD APIs ✅ Performance-critical scenarios | ✅ Large enterprise apps ✅ Teams familiar with MVC ✅ Complex routing requirements ✅ Extensive use of filters |
For this tutorial: We’re using Minimal APIs because they’re modern, performant, and perfect for our straightforward CRUD operations. They also align well with .NET’s current direction and reduce boilerplate code.
These are the conventional routes following REST Standards.
Conventional REST API Standards
- POST
/api/movies: Add a new movie - GET
/api/movies: Get all movies - GET
/api/movies/{id}: Get a movie by ID - PUT
/api/movies/{id}: Update a movie’s details - DELETE
/api/movies/{id}: Delete a movie by ID
Here’s how we can wire up the MovieService logic with the necessary API routes:
First, we register the IMovieService and its implementation in the Program.cs. This allows us to inject the service into our endpoints.
builder.Services.AddTransient<IMovieService, MovieService>();We’re using AddTransient here, which creates a new instance of MovieService for every request. This is appropriate for lightweight services that don’t maintain state. If you want to learn more about when to use Transient vs Scoped vs Singleton, check out my detailed guide on service lifetimes in .NET.
The above mentioned 5 CRUD Endpoints can be added into the Program.cs as well, but I would do something better.
To make the code cleaner and more maintainable, we can organize the API routes into a separate class, which helps keep the Program.cs file more focused and less cluttered. This structure also improves readability and reusability.
I created a folder named Endpoints and added a class called MovieEndpoints.
public static class MovieEndpoints{    public static void MapMovieEndpoints(this IEndpointRouteBuilder routes)    {        var movieApi = routes.MapGroup("/api/movies").WithTags("Movies");
        movieApi.MapPost("/", async (IMovieService service, CreateMovieDto command) =>        {            var movie = await service.CreateMovieAsync(command);            return TypedResults.Created($"/api/movies/{movie.Id}", movie);        });
        movieApi.MapGet("/", async (IMovieService service) =>        {            var movies = await service.GetAllMoviesAsync();            return TypedResults.Ok(movies);        });
        movieApi.MapGet("/{id}", async (IMovieService service, Guid id) =>        {            var movie = await service.GetMovieByIdAsync(id);
            return movie is null                ? (IResult)TypedResults.NotFound(new { Message = $"Movie with ID {id} not found." })                : TypedResults.Ok(movie);        });
        movieApi.MapPut("/{id}", async (IMovieService service, Guid id, UpdateMovieDto command) =>        {            await service.UpdateMovieAsync(id, command);            return TypedResults.NoContent();        });
        movieApi.MapDelete("/{id}", async (IMovieService service, Guid id) =>        {            await service.DeleteMovieAsync(id);            return TypedResults.NoContent();        });    }}
The MovieEndpoints class defines a set of API routes for movie-related operations using Minimal API style. The MapMovieEndpoints method is an extension for IEndpointRouteBuilder and is responsible for configuring the various HTTP methods (POST, GET, PUT, DELETE) for the /api/movies route.
- The method begins by defining a route group
/api/moviesand tagging it as “Movies” for better organization in tools like Swagger. - POST
/api/movies/: This route allows creating a new movie. It accepts aCreateMovieDtoobject, calls theCreateMovieAsyncmethod from the service, and returns a201 Createdresponse along with the newly created movie’s data. - GET
/api/movies/: This route retrieves all movies from the database by calling theGetAllMoviesAsyncmethod and returns the list of movies as a200 OKresponse. - GET
/api/movies/{id}: This route fetches a movie by its ID. If the movie is found, it returns the movie details; if not, it responds with a404 Not Foundmessage. - PUT
/api/movies/{id}: This route allows updating an existing movie’s details. It calls theUpdateMovieAsyncmethod with the movie’s ID and updated data from theUpdateMovieDto. It returns a204 No Contentstatus upon successful update. - DELETE
/api/movies/{id}: This route deletes a movie by its ID. It returns a204 No Content.
The overall structure keeps the API organized and clean, enabling scalable and easy-to-manage routes for the movie-related CRUD operations.
Finally, add the following extension to your Program.cs to register the above defined endpoints.
app.MapMovieEndpoints();This will wire up all the movie-related routes, and your application is now ready to handle movie-related requests through these clean and structured API endpoints.
Testing the API with Scalar
That’s everything you need to do from the code aspect. You can find the entire source code of this implementation on my GitHub repository, the link to which is available at the bottom of this article.
Let’s test this .NET 10 CRUD Application now. Build and run the application, and open up the Scalar UI.
Here is what you will see, all the API Endpoints ready to go!

I first tried the Get All Endpoint.

Since we added seed data, we can see that there is already a movie record available for us. This entry would be added as soon as the API boots up.
Let’s create a new entry. Use the POST /api/movies endpoint with the following JSON request body:
{ "title": "Inception", "genre": "Sci-Fi", "releaseDate": "2010-07-16T00:00:00Z", "rating": 8.8}Important: The releaseDate field must be in ISO 8601 format with a time zone indicator:
- ✅
"2010-07-16T00:00:00Z"(UTC) - ✅
"2010-07-16T00:00:00+00:00"(with offset) - ❌
"2010-07-16"(will cause deserialization error)
You can see that we get back a 201 Created response.
Try out the Get All endpoint to verify that our entry has been created.

Similarly, feel free to test out the
- Get By ID
- Delete
- Update Endpoints as well!
Next Steps
That wraps up our implementation! But there are still a few things you can do to elevate this .NET 10 Web API even further. Here are some next steps to enhance its functionality:
- Add Logging: Enhance the observability of your application by integrating structured logging using Serilog. Logging provides insights into what’s happening in your API, making it easier to troubleshoot issues. If you’re new to Serilog, check out my detailed guide on integrating it into ASP.NET Core here.
- Implement Global Exception Handling: Instead of handling errors within each endpoint, implement centralized global exception handling to catch and process exceptions consistently across your entire API. This improves maintainability and ensures uniform error responses.
- Add Input Validation: Although we’ve validated our domain layer, it’s a good practice to validate data at the DTO level as well. This ensures that only valid data reaches the business logic. You can easily achieve this with the FluentValidation library. If you’re unfamiliar with it, I’ve written a comprehensive tutorial here.
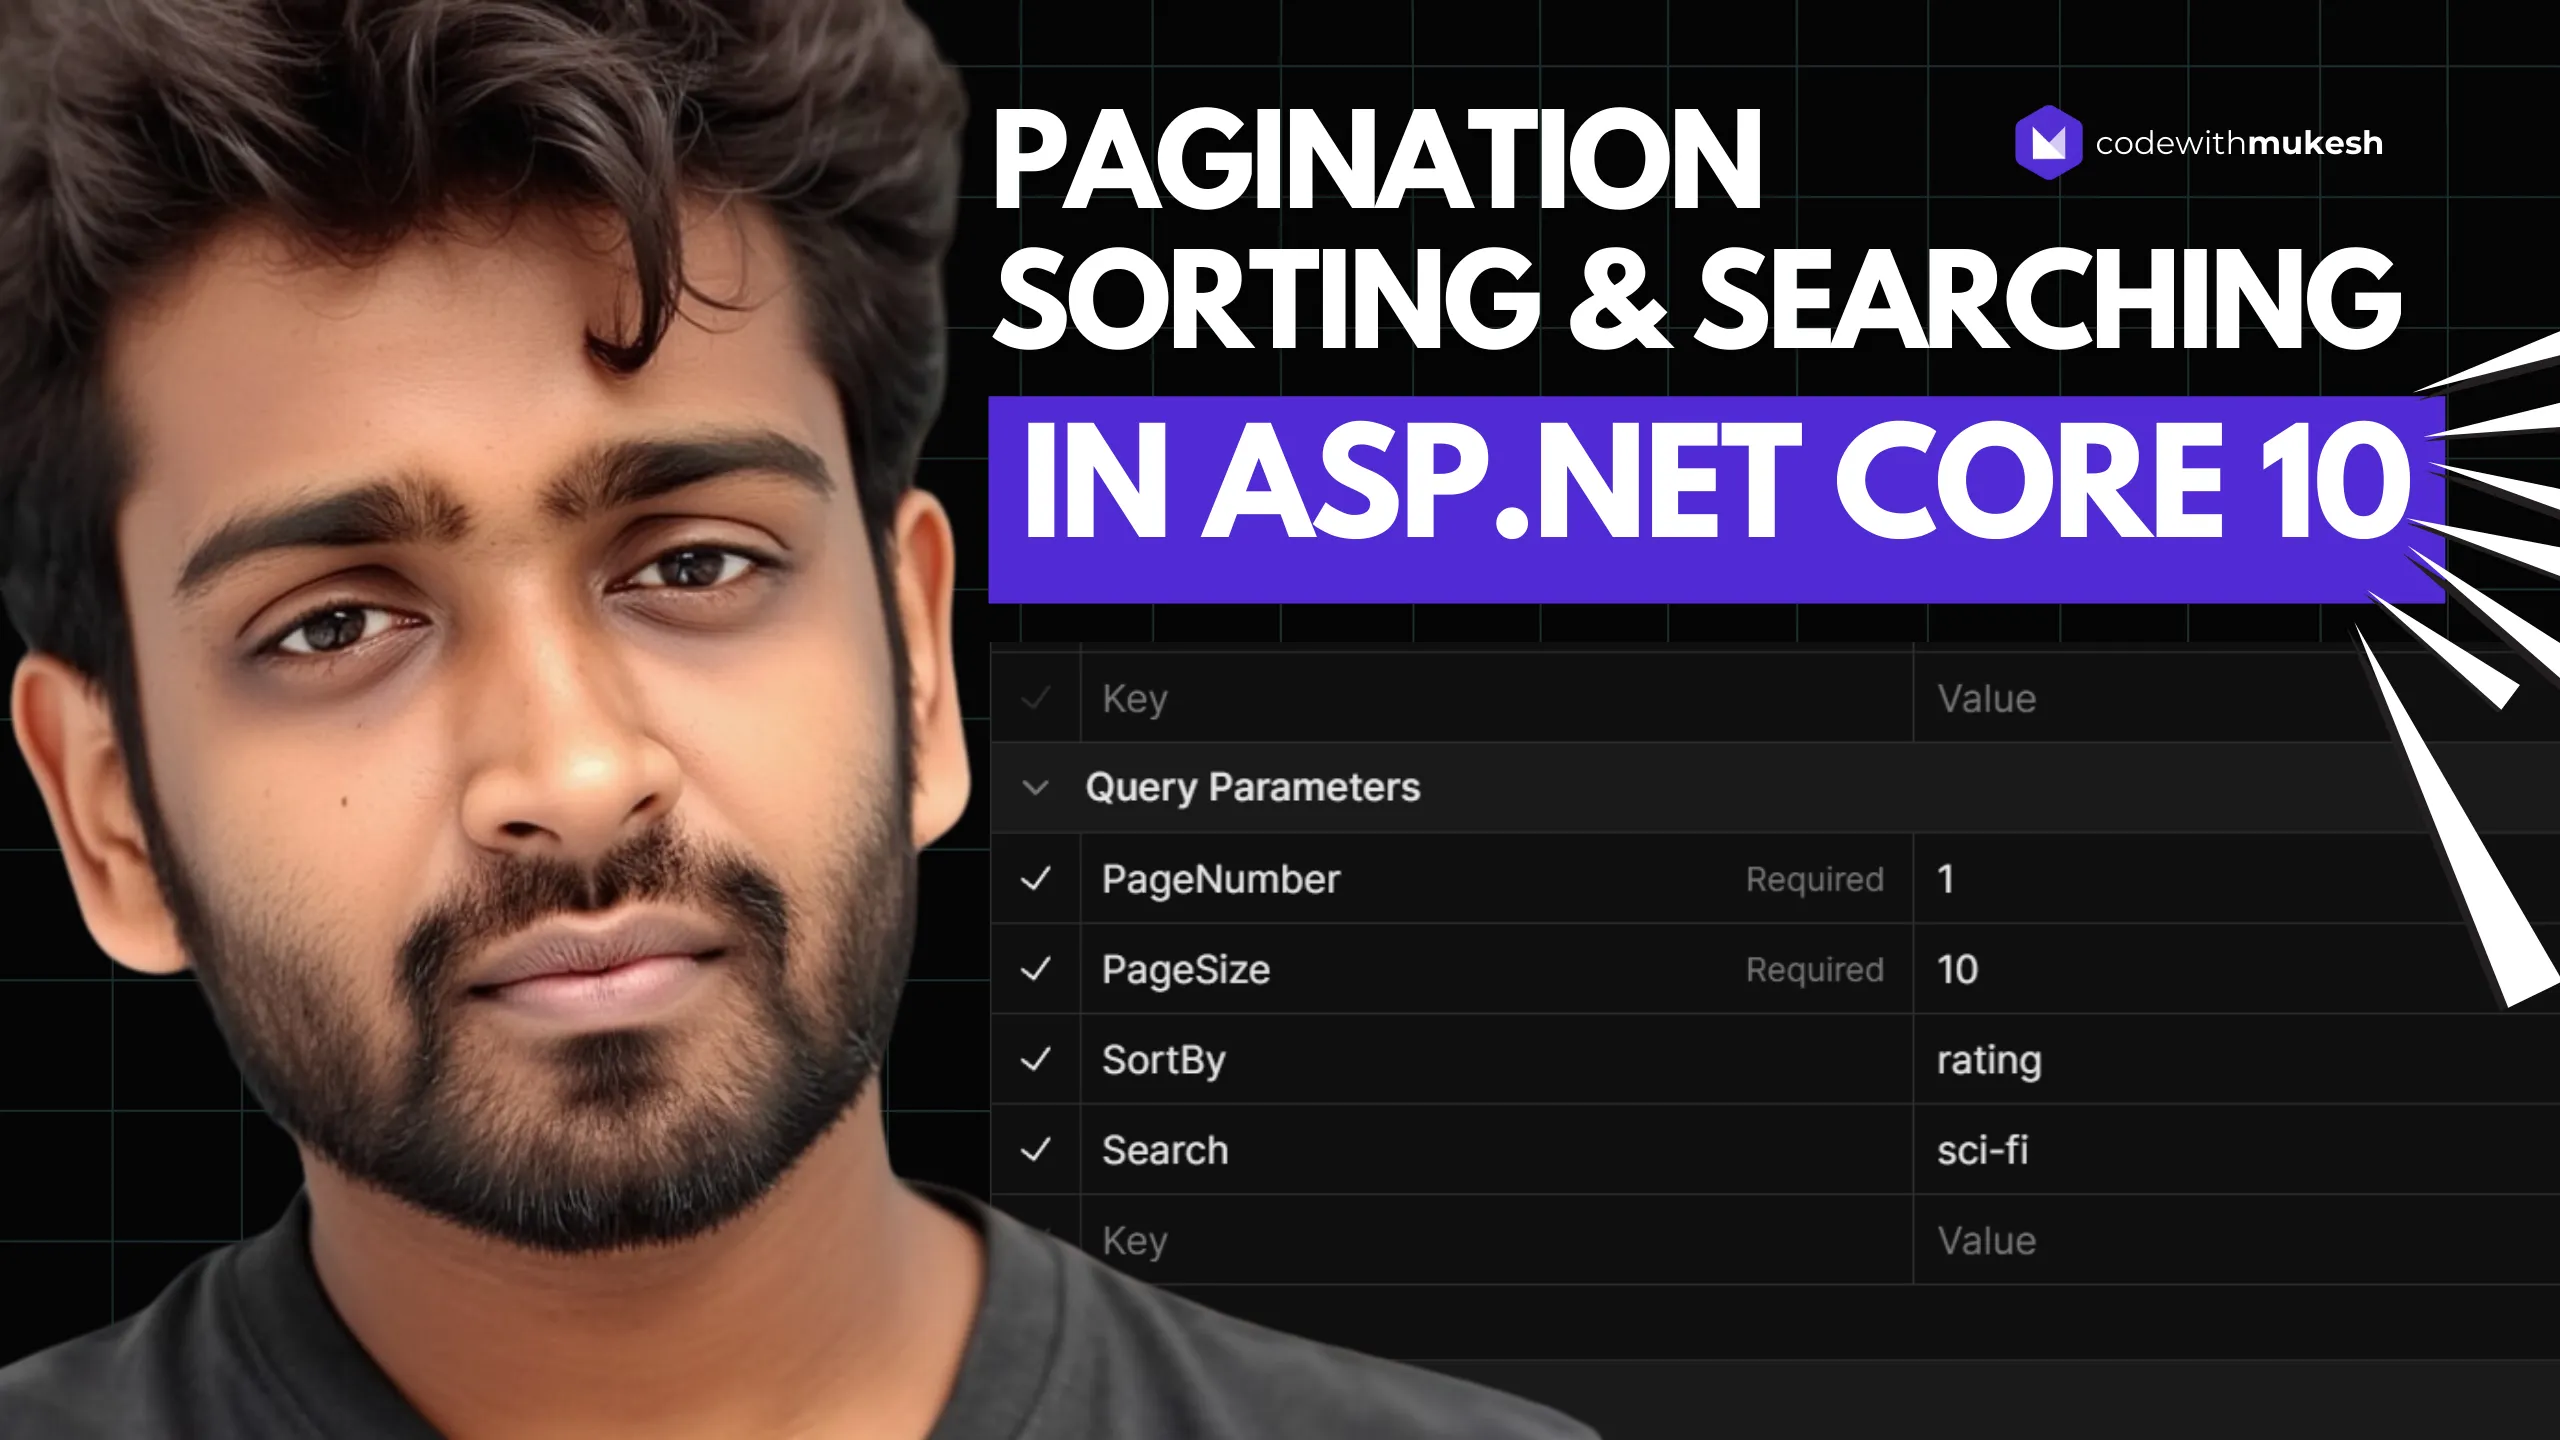
- Introduce Paging, Sorting, and Filtering: For larger datasets, adding features like paging, sorting, and filtering will significantly improve the performance and usability of your API. This makes it easy to retrieve specific subsets of data, particularly for endpoints that return large lists.
- Consider CQRS Pattern: As your application grows more complex, consider implementing the CQRS (Command Query Responsibility Segregation) pattern to separate read and write operations. This pattern, combined with MediatR, can significantly improve scalability and maintainability in larger applications.
- Explore Repository Pattern: While we’ve used a service layer directly accessing DbContext, you might also explore the Repository Pattern as an additional abstraction layer. This pattern can provide benefits in terms of testability and decoupling from EF Core specifics.
- Dockerize the Application: Dockerizing your application makes it more portable and scalable. It simplifies deployments across different environments. If you’re new to Docker, check out my Getting Started Guide for Docker to learn how to containerize your .NET applications.
- Deploy to the Cloud: Finally, take your application to the cloud! Whether it’s AWS, Azure, or Google Cloud, deploying your API to the cloud enhances scalability, security, and manageability. Each cloud provider has its own deployment strategies, but they all offer a variety of services to support your application.
By following these steps, you can transform your API into a production-ready, robust solution that scales efficiently while offering a seamless experience to users.
Common Issues & Troubleshooting
”Unable to resolve service for type ‘MovieDbContext’” Error
Symptom: When running the application, you get a runtime error stating that the DbContext cannot be resolved from the dependency injection container.
Root Cause: The DbContext was not registered in the DI container, or it was registered after it was needed.
Fix:
- Ensure
AddDbContext<MovieDbContext>is called inProgram.csbeforebuilder.Build() - Verify the connection string name matches exactly (case-sensitive)
- Make sure you’ve added the required NuGet packages (Microsoft.EntityFrameworkCore, Npgsql.EntityFrameworkCore.PostgreSQL)
“No such file or directory” when running migrations
Symptom: dotnet ef migrations add command fails with “No such file or directory” error.
Root Cause: EF Core tools are not installed globally or locally in your project.
Fix:
# Install EF Core tools globallydotnet tool install --global dotnet-ef
# Or install locally in your projectdotnet add package Microsoft.EntityFrameworkCore.Design
PostgreSQL connection refused error
Symptom: Application crashes with “Connection refused” or “server closed the connection unexpectedly” when trying to connect to PostgreSQL.
Root Cause: PostgreSQL Docker container is not running or not accessible.
Fix:
- Verify Docker is running:
docker ps - Check if PostgreSQL container is up:
docker ps | grep postgres - If not running, start it:
docker-compose up -d - Verify the connection string matches the Docker configuration (host, port, username, password)
“A second operation was started on this context” error
Symptom: Runtime exception when making multiple concurrent requests to the API.
Root Cause: DbContext instances are not thread-safe and a single instance is being shared across multiple requests.
Fix:
- Ensure you’re using
AddDbContext(notAddSingleton<DbContext>) - Always use
async/awaitproperly - don’t mix blocking and async code - Don’t store DbContext as a static field or singleton
- Use scoped lifetime for DbContext (default when using
AddDbContext)
Domain validation exceptions not shown in API responses
Symptom: When domain validation fails (e.g., invalid movie rating), the client sees a 500 error instead of a helpful validation message.
Root Cause: Exceptions from domain entities are not being caught and transformed into proper HTTP responses.
Fix: Add exception handling middleware or wrap domain operations in try-catch blocks:
movieApi.MapPost("/", async (IMovieService service, CreateMovieDto command) =>{ try { var movie = await service.CreateMovieAsync(command); return TypedResults.Created($"/api/movies/{movie.Id}", movie); } catch (ArgumentException ex) { return TypedResults.BadRequest(new { Error = ex.Message }); }});“JSON value is not in a supported DateTimeOffset format” error
Symptom: POST request to create a movie fails with System.Text.Json.JsonException: The JSON value is not in a supported DateTimeOffset format when sending the releaseDate field.
Root Cause: The JSON date format doesn’t match the expected ISO 8601 format with timezone information that System.Text.Json requires for DateTimeOffset deserialization.
Fix: Use the correct ISO 8601 format with timezone indicator in your JSON:
✅ Correct formats:
{ "title": "Inception", "genre": "Sci-Fi", "releaseDate": "2010-07-16T00:00:00Z", "rating": 8.8}Or with explicit offset:
{ "releaseDate": "2010-07-16T00:00:00+00:00"}❌ Incorrect format (will fail):
{ "releaseDate": "2010-07-16"}Note: System.Text.Json (used by ASP.NET Core by default) requires the full ISO 8601 format with time and timezone for DateTimeOffset. The Z suffix indicates UTC time, or you can use an explicit offset like +00:00.
DateTime timezone issues with PostgreSQL
Symptom: Date/time values are being saved or retrieved with incorrect timezone information.
Root Cause: PostgreSQL stores timestamps with timezone information, but DateTime in C# is timezone-agnostic.
Fix:
Use DateTimeOffset instead of DateTime (which we already do in this tutorial). DateTimeOffset preserves timezone information and works correctly with PostgreSQL’s timestamptz type. If you must use DateTime, explicitly specify DateTime.SpecifyKind() or configure Npgsql to handle it:
options.UseNpgsql(connectionString, o => o.EnableLegacyTimestampBehavior());Frequently Asked Questions
What is the difference between EF Core and Entity Framework?
Entity Framework Core is a lightweight, cross-platform, open-source version of Entity Framework designed for modern .NET applications. Unlike the legacy Entity Framework 6.x, EF Core works on Windows, Linux, and macOS, and supports .NET Core, .NET 5+, and .NET Framework. EF Core is faster, more modular, and includes new features like global query filters, compiled models, and better LINQ translation.
Should I use Code First or Database First approach?
For new projects, Code First is recommended because it gives you full control over your domain models and keeps your entities clean without database-specific attributes. Code First works better with version control, makes migrations easier to manage, and aligns well with Domain-Driven Design principles. Database First is primarily useful when working with existing legacy databases where the schema already exists and cannot be changed.
How do I secure my PostgreSQL connection string in production?
Never hardcode credentials in appsettings.json for production. Instead, use environment variables, Azure Key Vault, AWS Secrets Manager, or similar secret management services. For Azure, use Managed Identity to connect to databases without storing credentials at all. For Docker deployments, pass connection strings as environment variables at runtime. Always use SSL/TLS for database connections in production.
What's the difference between AddDbContext and AddDbContextPool?
AddDbContext creates a new DbContext instance for each request, while AddDbContextPool reuses DbContext instances from a pool, providing better performance for high-throughput scenarios. DbContext pooling reduces the overhead of creating and disposing contexts repeatedly. However, be careful with context pooling if you modify DbContext state or use features like lazy loading, as pooled contexts are reset between requests but not fully reinitialized.
When should I use AsNoTracking()?
Use AsNoTracking() for read-only queries where you don't plan to modify the entities. It significantly improves performance by skipping change tracking overhead, reducing memory consumption, and speeding up query execution. This is perfect for GET endpoints that only retrieve and display data. However, do not use AsNoTracking() if you need to update or delete the entities, as EF Core won't track changes and updates won't work.
How do I handle concurrency conflicts in EF Core?
EF Core supports optimistic concurrency using concurrency tokens. Add a [Timestamp] or [ConcurrencyCheck] attribute to a property (commonly a byte[] RowVersion field). When a conflict occurs, EF Core throws a DbUpdateConcurrencyException. You can catch this exception and decide how to handle it - either refresh the entity with current database values, retry the operation, or show an error to the user.
What are DTOs and why should I use them?
DTOs (Data Transfer Objects) are simple objects used to transfer data between layers of your application. They decouple your domain entities from API contracts, prevent overexposure of sensitive data, enable versioning of API responses, and provide a clean boundary for validation and transformation. Never expose domain entities directly in your API responses - always use DTOs to maintain control over what data is sent to clients.
Should I use Minimal APIs or Controllers for Web APIs?
For simple APIs and microservices, Minimal APIs are recommended due to their simplicity, better performance, and less boilerplate code. They're perfect for CRUD operations and straightforward endpoints. However, Controllers provide better organization for complex APIs with many endpoints, built-in support for API conventions, easier testing with TestServer, and better tooling support. For this tutorial, we use Minimal APIs because they're cleaner and more modern, but both approaches are valid depending on your project's complexity.
How do I connect ASP.NET Core to PostgreSQL?
First, install the Npgsql.EntityFrameworkCore.PostgreSQL NuGet package. Then, configure your DbContext with UseNpgsql in Program.cs: builder.Services.AddDbContext<YourDbContext>(options => options.UseNpgsql(builder.Configuration.GetConnectionString("DefaultConnection"))). Add your connection string to appsettings.json with format: "Host=localhost;Port=5432;Database=yourdb;Username=admin;Password=secret". For Docker, ensure PostgreSQL is running and accessible on the specified port. Finally, create and apply migrations using dotnet ef migrations add Initial and dotnet ef database update.
What is the difference between SaveChanges and SaveChangesAsync?
SaveChanges blocks the current thread until the database operation completes, which can cause performance issues in web applications. SaveChangesAsync is non-blocking and releases the thread back to the thread pool while waiting for the database, allowing your server to handle more concurrent requests. Always use SaveChangesAsync in ASP.NET Core applications for better scalability and performance. The only time to use synchronous SaveChanges is in desktop applications or synchronous contexts where async is not supported.
How do I handle EF Core migrations in production?
Never run migrations automatically on application startup in production - this can cause downtime and conflicts in multi-instance deployments. Instead, use a deployment pipeline approach: 1) Generate migration scripts with dotnet ef migrations script, 2) Review the generated SQL for safety, 3) Apply migrations during a maintenance window or as part of your CI/CD pipeline before deploying the new application version. For zero-downtime deployments, use backward-compatible migrations and deploy in phases: first deploy the database changes, then deploy the application code that uses them.
Summary
I hope this guide has helped you build a solid foundation for your .NET Web API. I have put in a lot of effort and time into this article to make it a truly valuable resource for the .NET Developers!
If you found this article useful, I’d love to hear your feedback! Did you enjoy it? What other topics would you like me to cover next? Drop a comment or reach out, and let me know what you’d like to see in the future.
And if you think others might benefit from this article, feel free to share it with your network. Sharing is caring, and it helps the community grow!
Thanks for reading, and stay tuned for more helpful content!